Motioneyeos.
Normally I am not fond of canned software, but this one might be an exception. Motioneyeos is a raspberry pi implementation for the program Motion. Motion is software to control video capture devices. All control is done via the web. For purposes of this project we used an original raspberry pi. (https://github.com/ccrisan/motioneyeos/releases). There are several releases depending on the unit you have.
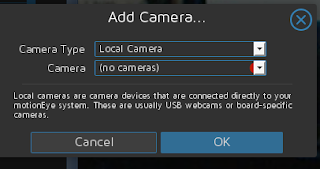

First I tried a logitech usb camera clone. The system recognized it immediately. Not like a certain other operating system where you have to load the drivers for almost everything.

Then we added an ipcamera (network ready). After adding the network camera file, it worked just like you would expect. The documentation for the camera did not have the description of the file. Fortunately the Motion software site did have that information. (http://www.lavrsen.dk/foswiki/bin/view/Motion/WorkingDevices) Again no additional drivers were required.

Actual picture is much clearer. For a novice user it is pretty simple. Only exception is shutting the unit down, I did not see a visible icon. Also security could be greater, but for the price of free you can not beat it.
installing motion from scratch:
Let's get your system up to date (might take a while if you have not updated very recently).
$ sudo apt-get update ; sudo apt-get upgrade
$ sudo apt-get dist-upgrade
Now let's install Motion
$ sudo apt-get install motion.
Does the RPi see your camera? (aka list usb devices attached.)
$ lsusb
...
Bus 001 Device 004: ID 046d:08a9 Logitech, Inc. Notebook Deluxe
...
if not, you may need to get a more mainstream camera. usually Logitech sets the standard. I just used a cheap refurbished knickoff. Your output will vary..
Do a little configuration:
To ensure that the motion service will actually start as a daemon we need to change another configuration setting, so enter the following:
sudo nano /etc/default/motion
Then change the value “start_motion_daemon=no” to “yes”
Let's get started:
Finally you can start the motion service to stream the web cam images
sudo service motion start
Then after about 30 seconds browse to the new web interface, which should be at the below URL (where 192.168.0.100 is your Raspberry PI’s IP address yours may vary)
http://192.168.0.100:8081
Hint: if you do not have direct access to your RPi, you can use https://www.instructables.com/id/Red-October-network-discovery/ to find it on the network. Frequently I will hook up the RPi to the network without a keyboard, mouse, or monitor and then remote into the unit,
Also:
Note if you want to use an ipcamera it is easy but you have to know about the camera. I ended up going to the zoneminder wiki and found the answer for my camera. Setup is the same, but you have to add two lines to motion.conf.
netcam_url http://19.168.10.85/videostreadlocationsomekindof.cgi
netcam_userpass user:password
For us it was:
netcam_url http://192.168.10.85/video.cgi
netcam_userpass user:password


First I tried a logitech usb camera clone. The system recognized it immediately. Not like a certain other operating system where you have to load the drivers for almost everything.

Then we added an ipcamera (network ready). After adding the network camera file, it worked just like you would expect. The documentation for the camera did not have the description of the file. Fortunately the Motion software site did have that information. (http://www.lavrsen.dk/foswiki/bin/view/Motion/WorkingDevices) Again no additional drivers were required.

Actual picture is much clearer. For a novice user it is pretty simple. Only exception is shutting the unit down, I did not see a visible icon. Also security could be greater, but for the price of free you can not beat it.
installing motion from scratch:
Let's get your system up to date (might take a while if you have not updated very recently).
$ sudo apt-get update ; sudo apt-get upgrade
$ sudo apt-get dist-upgrade
Now let's install Motion
$ sudo apt-get install motion.
Does the RPi see your camera? (aka list usb devices attached.)
$ lsusb
...
Bus 001 Device 004: ID 046d:08a9 Logitech, Inc. Notebook Deluxe
...
if not, you may need to get a more mainstream camera. usually Logitech sets the standard. I just used a cheap refurbished knickoff. Your output will vary..
Do a little configuration:
$ sudo nano /etc/motion/motion.confIn here there are a few basic changes that you need to perform:
- Daemon = OFF to ON
- webcam_localhost = ON to OFF
To ensure that the motion service will actually start as a daemon we need to change another configuration setting, so enter the following:
sudo nano /etc/default/motion
Then change the value “start_motion_daemon=no” to “yes”
Let's get started:
Finally you can start the motion service to stream the web cam images
sudo service motion start
Then after about 30 seconds browse to the new web interface, which should be at the below URL (where 192.168.0.100 is your Raspberry PI’s IP address yours may vary)
http://192.168.0.100:8081
Hint: if you do not have direct access to your RPi, you can use https://www.instructables.com/id/Red-October-network-discovery/ to find it on the network. Frequently I will hook up the RPi to the network without a keyboard, mouse, or monitor and then remote into the unit,
Also:
Note if you want to use an ipcamera it is easy but you have to know about the camera. I ended up going to the zoneminder wiki and found the answer for my camera. Setup is the same, but you have to add two lines to motion.conf.
netcam_url http://19.168.10.85/videostreadlocationsomekindof.cgi
netcam_userpass user:password
For us it was:
netcam_url http://192.168.10.85/video.cgi
netcam_userpass user:password


I have ZM installed on my Media Server that runs multiple programs including Apache, email server, and Mysql with no issues. I don't know if the earlier stages of Zm was picky like that but its more friendly now neat! do this to my room!