Posts

Showing posts with the label arduino

Legacy computer home automation server

Image
Using legacy systems to do home automation when an Arduino or Raspberry Pi may not be available. They can work just as well.  Server is a Pentium III with Ubuntu and Apache2. Enabled CGI (common gateway interface). Wrote all my own scripts using html, bash, and compiled freebasic (controls the leds).    Leds are connected to the parallel port via a home made adapter cable. Most of the code and interfaces are described in previous articles.  Added the video to the home web page: Time to control real world object such as a coffeemaker. For more information: http://www.tldp.org/HOWTO/text/Coffee
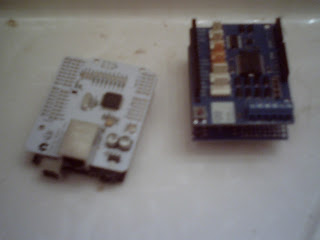
Barebone arduino ethernet.

Image
Notice: use at your own risk. If you have an Arduino with a removable chip, then you can use that to program the chip. Otherwise there are circuits to program the standalone Arduino. See "https://www.arduino.cc/en/Tutorial/ArduinoToBreadboard" for more details".   The bare Arduino setup. You need a power source not shone. We used a 4 D size battery setup. Barebones setup before adding ethernet: Wiring:  Downloaded the latest Arduino and Ethercard software. Loaded both of them on the computer. Imported code for a simple web server. // Present a "Will be back soon web page", as stand-in webserver. // 2011-01-30 <jc@wippler.nl> http://opensource.org/licenses/mit-license.php #include <EtherCard.h> #define STATIC 0  // set to 1 to disable DHCP (adjust myip/gwip values below) #if STATIC // ethernet interface ip address static byte myip[] = { 192,168,1,200 }; // gateway ip address static byte gwip[] = { 192...

Documentation is bad sometimes.

Image
Sometimes you just want to tear your hair out when the documentation of a product is WRONG. Something I ran into recently when trying to attach an enc28j60 from Hanrun to my genuine Arduino. I have used the ethernet shield on the Arduino without a hitch. So I supposed there would be no problem again... So I thought. Followed the map for hooking the two devices together as follows: VCC -   3.3V GND -    GND SCK - Pin 13 SO  - Pin 12 SI  - Pin 11 CS  - Pin  8 Downloaded the latest Arduino and Ethercard software. Loaded both of them on the computer. Imported code for a simple web server. // Present a "Will be back soon web page", as stand-in webserver. // 2011-01-30 <jc@wippler.nl> http://opensource.org/licenses/mit-license.php #include <EtherCard.h> #define STATIC 0  // set to 1 to disable DHCP (adjust myip/gwip values below) #if STATIC // ethernet interface ip address static byte myip[] = { 192,168,1,2...

Arduino conversion.

Image
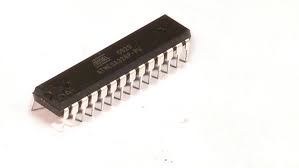
Using the Arduino development boards can be cumbersome and a bit more expensive. But for simple projects, a standalone Arduino chip just just the right choice. We will convert a typical circuit for a board to a standalone chip setup. int piezoPin = 8; // Declaring Piezo Buzzer on Pin 8 int ldrPin = 0; // Declaring LDR on Analog Pin 0 int ldrValue = 0; // Reading different values from the LDR void setup() { } void loop() { // Starting the cycle functions below ldrValue = analogRead(ldrPin); // read the value from the LDR tone(piezoPin,1000); // Play a 1000Hz tone from the piezo (beep) delay(25); // wait a bit, change the delay for fast response. noTone(piezoPin); // stop the tone after 25 ms in this case delay(ldrValue); // wait the amount of milliseconds in ldrValue } // End of cycle functions      Or   // variable declaration // sensor value int value; // low sensor value calibration int low; // high sensor value calibration...

Make your palmtop more valuable.

Image
Do  you feel as if your palmtop is a one trick pony now. Can your palmtop do all this? They can! Either through a web browser or a remote desktop viewer.  having a local web server, you can install applications that will run without the internet but do work with the local intranet.There is even software that will emulate a computer desktop. Most palmtops have terminal server clients.  With the remote desktop viewer you can access another working computer on the network be it Linux, OS/x, or even Mswindows. You start the rdp (remote desktop protocol viewer) software and then enter the hostname address. Of you will need to set up a login and password on the host for if nothing else minimal security restrictions. Once your in, you can use the hosts as if that operating system was on your palmtop! Here we have access a remote Linux computer. You can even get a remote Raspberry Pi desktop, so the RPi does not need a monitor. For more inform...

The PCinoPi

Image
The PCinoPi available from many junk closets is not faster than a speeding bullet and  not faster than a speeding train but it can easily introduce you to computers and electronics. Will run Pitus Linux, Atomic Linux, Freedos (with Qbasic), among other operating systems right from the floppy drive. (Pictured is an i486 laptop) You can easily do digital control with it's legacy parallel port. Lighting led's is a cinch. Controlling  rocket launchers is another benefit.  Need to do analog input? With a few discrete parts you can even get analog values too. Say grabbing the temperature. If the vga port is new enough, you can even use I2C   Extra cable and interfacing not included but can be built with off the shelf parts. Vga ( http://www.instructables.com/id/Vga-breakout-cable/ )   Rs232 ( http://www.instructables.com/id/DB9-serial-break-out-cable/ ) Parallel ( http://www.instructables.com/id/No-solder-parallel-port...

Arduino and the legacy printer port.

Image
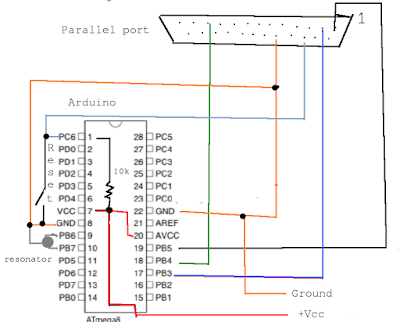
Try at your own risk!!!! It could brick your arduino!! 1. Minimal Arduino I recently got really interested in Arduino hardware. For those who don't know what it is,   Arduino is an open-source electronics prototyping platform based on flexible, easy-to-use hardware and software. It's intended for artists, designers, hobbyists, and anyone interested in creating interactive objects or environments. http://arduino.cc/    So I looked for ways to make my own board but as I am not into electronics, I needed something really simple, where I just needed to put in components, abracadabra and it should start working. So after much research (Googling actually) I have now learned how to make a minimal Arduino clone. PARTS LIST ATmega168 (or similar e.g. ATmega8) (Rs. 300) A Breadboard (Rs. 150) 7805 Voltage regulator (Rs.10) 2 LEDs (Rs. 5) 2 10 uF capacitors (Rs.5) 16 MHz clock crystal 2 22 pF capacitors 2 220 Ohm resistors 1 10k Ohm resistor small mome...

The arduino web server.

Image
      Minimal to use the Arduino as a web server and that is already in a sketch that you can use. You need to edit the code so it will work in your network.   [code] #include <SPI.h> #include <Ethernet.h> /******************** ETHERNET SETTINGS ********************/ byte mac[] = { 0x90, 0xA2, 0xDA, 0x0D, 0x85, 0xD9 }; //physical mac address byte ip[] = { 192, 168, 0, 112 }; // ip in lan byte subnet[] = { 255, 255, 255, 0 }; //subnet mask byte gateway[] = { 192, 168, 0, 1 }; // default gateway EthernetServer server(80); //server port void setup() { Ethernet.begin(mac,ip,gateway,subnet); // initialize Ethernet device server.begin(); // start to listen for clients pinMode(8, INPUT); // input pin for switch } void loop() { EthernetClient client = server.available(); // look for the client /* a place for the code*/ dela...

Wifi and the Arduino.

Image
Good for arduino to arduino. Have some of the nrf24l0 wifi units to play with. will test them with the Arduino first. One person suggest that a 100 nf capacitor be placed between plus five and ground for more power stability. More information at: http://playground.arduino.cc/InterfacingWithHardware/Nrf24L01 Experimental code: https://github.com/tmrh20/RF24 Note had to set up and SPI directory and copy the files over to the Arduino folder. The you had to tell the arduino  about the library ---------------------------------------------------------------------------------------------- Compatible to computer networks. What is the ESP8266? The ESP8266, is a cheap WiFi module which you can address using the UART protocol. It’s been featured on Hackaday and other DIY electronics blogs very recently, and lots of DIY electronics tinkers are very excited at the doors this module opens for their projects. The module is: Small Footprint Easy to integrate with (usi...

Arduino web server - analog

Image
If you have ever loaded the ethernet software from the Arduino IDE, you will recognize this web page. This article is more about window dressing more than anything else. The Arduino comes with a nice bit of web server code that reports the results of some temperature sensors. Thought the code could use at least some minimal improvements. Also put the the Arduino web address on the dns so that it could be called by the hostname lookup instead of the ipaddress. The important part of the changed code is included. Normally you can not store images on the Arduino, but you can reference them from another site. [code] void loop() {   // listen for incoming clients   EthernetClient client = server.available();   if (client) {     Serial.println("new client");     // an http request ends with a blank line     boolean currentLineIsBlank = true;     while (client.connected()) {    ...