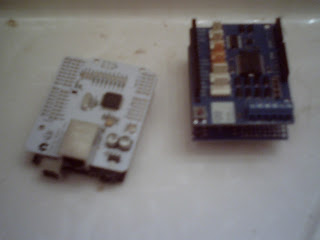
Minimal to use the Arduino as a web server and that is already in a sketch
that you can use. You need to edit the code so it will work in your network.
[code]
#include <SPI.h>
#include <Ethernet.h>


/******************** ETHERNET SETTINGS ********************/

byte mac[] = { 0x90, 0xA2, 0xDA, 0x0D, 0x85, 0xD9 };  //physical mac address
byte ip[] = { 192, 168, 0, 112 };                   // ip in lan
byte subnet[] = { 255, 255, 255, 0 };              //subnet mask
byte gateway[] = { 192, 168, 0, 1 };              // default gateway
EthernetServer server(80);                       //server port


void setup()
{
Ethernet.begin(mac,ip,gateway,subnet);     // initialize Ethernet device
server.begin();                             // start to listen for clients
pinMode(8, INPUT);                         // input pin for switch
}

void loop()
{
EthernetClient client = server.available();   // look for the client

/* a place for the code*/

delay(1);      // giving time to receive the data

/*
The following line is important because it will stop the client
and look for the new connection in the next iteration i.e
EthernetClient client = server.available();
*/
client.stop();
}
[/code]
Now for the code to do what you want the Arduino to do. Almost looks like
a type of cgi script. This goes in the middle of the script. Definitely
some errors in this case.
[code]
client.println("HTTP/1.1 200 OK");
client.println("Content-Type: text/html");
client.println("Connnection: close");
client.println();
client.println("<!DOCTYPE html>");
client.println("<html>");
client.println("<head>");
client.println("<title>Ethernet Tutorial</title>");
client.println("<meta http-equiv=\"refresh\" content=\"1\">");
client.println("</head>");
client.println("<body>");
client.println("<h1>A Webserver Tutorial </h1>");
client.println("<h2>Observing State Of Switch</h2>");
client.print("<h2>Switch is: </2>");
if (digitalRead(8))
{
client.println("<h3>ON</h3>");
}
else
{
client.println("<h3>OFF</h3>");
}
client.println("</body>");
client.println("</html>");
[/code]
This what the code might look like all put back together and have made
a few changes.
[code]
#include <SPI.h>
#include <Ethernet.h>
/******************** ETHERNET SETTINGS ********************/
byte mac[] = { 0x90, 0xA2, 0xDA, 0x0D, 0x85, 0xD9 }; //physical mac address
byte ip[] = { 192, 168, 1, 112 }; // ip in lan
byte subnet[] = { 255, 255, 255, 0 }; //subnet mask
byte gateway[] = { 192, 168, 1, 1 }; // default gateway
EthernetServer server(80); //server port
void setup()
{
Ethernet.begin(mac,ip,gateway,subnet); // initialize Ethernet device
server.begin(); // start to listen for clients
pinMode(8, INPUT); // input pin for switch
}
void loop()
{
EthernetClient client = server.available(); // look for the client
// send a standard http response header
client.println("HTTP/1.1 200 OK");
client.println("Content-Type: text/html");
client.println("Connnection: close");
client.println();
/*
This portion is the webpage which will be
sent to client web browser one can use html , javascript
and another web markup language to make particular layout
*/
client.println("<!DOCTYPE html>"); //web page is made using html
client.println("<html>");
client.println("<head>");
client.println("<title>Ethernet Tutorial</title>");
client.println("<meta http-equiv=\"refresh\" content=\"1\">");
/*
The above line is used to refresh the page in every 1 second
This will be sent to the browser as the following HTML code:
<meta http-equiv="refresh" content="1">
content = 1 sec i.e assign time for refresh
*/
client.println("</head>");
client.println("<body>");
client.println("<h1>A Webserver Tutorial </h1>");
client.println("<hr>");
client.println("<h2>Observing State Of Switch</h2>");
client.println("<center>");
client.println("<table border='1'>");
client.println("<td>");
client.println("<tr>");
client.println("<td>");
client.print("<h2>Switch is: </h2>");
client.println("</td>");
client.println("<td>");
if (digitalRead(8))
{
client.println("<h3>ON</h3>");
}
e
[/code]
-------------
Felt should of added this information.
Hardware Required
- 1 x Ethernet cable
- 1 x Wi-Fi Router
- 1 x Arduino Mega2560 (should work with regular Arduino.)
- 1 x Ethernet Shield
- 1 x Breadboard
- 3 x Jumper Wires
- 1 x 1k Resistor
- 2 x 9V Adaptor
- 1 x pushbutton


Comments
Post a Comment