Posts

Showing posts from 2017

To do this weekend.

Image
Out of Micro sd cards so it is time to get a few more.  Finally have my rpi 0 w to play with. Finally have Pimoroni hammer headers. They do not come with instructions, but that was finally figured out.  Nice they gave you a choice of either female or male headers. Also have the speaker bonnets, but they do not come with speakers so the ad is misleading, Only have a few atmel368 chips left. Have a project or two for them. Have the rpi zero w teathered to my nexus 7 2012. ---- Using the spi version of the ethernet interface with the rpi zero. Your connection may vary. ---- Set up a Raspberry Pi Zero headless If you are using the GUI (Raspian full download) and want to connect your RPi Zero to a keyboard and monitor there are probably easier ways to do this. These notes are for people that want to use a headless (no monitor and GUI) setup ready to connect to your RPi after first boot via SSH from another terminal. Download Raspb

Odd monitors for the Raspberry Pi.

Image
If you do not have access to hdmi based monitors, any old monitor with composite input used with the old eight bit computers should do fine. You may have to purchase a special cabIe. I like to use my old c=1701. You can even add a digital tuner and use it as a tv. Some old TV's that do not have composite but do have rf input can be used with a vcr My favorite is to use an old dvdrom player with composite and audio input. You can always attach a Raspberry Pi to the back of the unit to make it super portable. Even an old portable tv with composite input can be a choice! In the case though it is only black and white. Then again you can use your tablet via xrdp to act as a screen for your raspberry Pi. Last but not least is the old Trs-80 monitor. No sound and is only black and white. You also have to provide a +5 volts line externally.. There is always those inexpensive mini portable monitors, but they may require 12 volts to work. Normally use

Starting slackware 14.2 in a virtual machine.

Image
Started with Slackware linux and decided to go back and look at it.  In this case, I plan to use qemu to build a virtual machine. You will need to have a stable internet access for this project. You also need to have a fast machine with over a gig of memory.  You will not need to download and burn a cd or dvd.  You will need a floppy, usb, cd, or a network interface card that supports gpxe (ipxe). You will want to go to romomatic,net to build your image to put on your boot device. Though with Qemu you can just use the image without creating boot media,  Though I do recommend using 256 megabytes of ram. Be sure to set up the virtual drive for your install. Once you have everything the way you want then you can launch the install. Eventually you will get to a login and the you can start the the good old install; AAh, at home again. ------------------------------------------------------------------------------------------------------- Slackware pxeboot script:

Motioneyeos.

Image
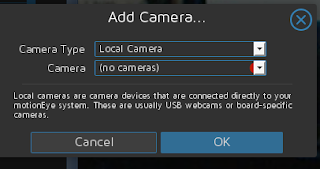
Normally I am not fond of canned software, but this one might be an exception. Motioneyeos is a raspberry pi implementation for the program Motion. Motion is software to control video capture devices. All control is done via the web. For purposes of this project we used an original raspberry pi. ( https://github.com/ccrisan/motioneyeos/releases ). There are several releases depending on the unit you have. First I tried a logitech usb camera clone. The system recognized it immediately. Not like a certain other operating system where you have to load the drivers for almost everything. Then we added an ipcamera (network ready). After adding the network camera file, it worked just like you would expect. The documentation for the camera did not have the description of the file. Fortunately the Motion software site did have that information.  ( http://www.lavrsen.dk/foswiki/bin/view/Motion/WorkingDevices ) Again no additional drivers were required. Actual picture is much cl

Basic pi setup.

Image
  Basic setup ----------------- install jessie os do updates install vim mc Wifi ------ Check Ethernet & Wifi Before continuing make sure the Ethernet cable is connected in and you can ping out from the Pi: ping 8.8.8.8 You will also want to set up your WiFi dongle. run sudo shutdown -h now and then plug in the WiFi module when the Pi is off so you don't cause a power surge. If you have a Pi 3, or any other Pi with built in WiFi, an external WiFi adapter is not required but you can use one if you need a bigger/external antenna.  When it comes back up check with ifconfig -a that you see wlan0 - the WiFi module. Install software ----------------- Next up we install the software onto the Pi that will act as the 'hostap' (host access point). You need internet access for this step so make sure that Ethernet connection is up! sudo apt-get update sudo apt-get install hostapd isc-dhcp-server (You may need to sudo apt-get update if the Pi can

Old vcr ir sensor.

Image
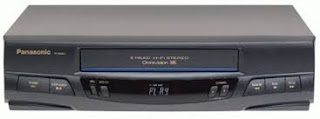
An old fashion vcr can be a treasure trove of re-usable spare parts for electronic and robotics. Although they are quickly disappearing, you can still find them in a few thrift stores. In this case, I rescued the vcr channel ir sensor. Also added extension wires  for use with a breadboard. There is a ton of code out there, but the connections setup is the most vital. There are three basic connections of data, plus, and minus, You will probably have to do a web lookup to get the pinout of the ir sensor. Then look for the circuit that applies. http://playground.arduino.cc/Main/PanasonicIrSensor

Lcd pixel fix.

Image
Fixing a bad pixel on some lcd monitors is as easy as using a ball point pen. Be gentle and do not puncture the screen. Then rub the screen with a cloth to restore the screen.

Raspberry pi zero.

Image
Instead of getting the rpi zero w, I will just add a usb female to my existing pi for the time being.Have lots of leftover cables for the cause.. Can always plug in a wifi or bluetooth module.   Various notes: Simplest configuration to connect to an unsecured wireless router knowing it;s essid: #linux auto lo iface lo inet loopback auto eth0 iface eth0 inet dhcp allow-hotplug wlan0 auto wlan0 iface wlan0 inet dhcp wireless-essid router-essid  Improvisational solder less header pin for the rpi zero Original pi zero fully decked out. with bluetooth, wired m and wireless. Basic setup ----------------- install jessie os do updates install vim mc Wifi ------ Check Ethernet & Wifi Before continuing make sure the Ethernet cable is connected in and you can ping out from the Pi: ping 8.8.8.8 You will also want to set up your WiFi dongle. runsudo shutdown -h now and then plug in the WiFi module when the Pi is off so you don't cause a

Another way to use audacity.

Image
Just an idea or two, My brother is an awesome guitar player and he said I could download the audio of him playing. Export files as .mp3 and then move them to the server.

Stepper motor and the parallel port.

Image
Various stepper motors, They are great for robots and other automation projects.  The same ideas can be used with micro-controllers.Here are just a few notes. Testing stepper motor wiring: http://www.piclist.com/techref/io/stepper/wiresmeterbattery.htm The bipolar motor (4 wire): From an old Seagate hard drive. Unipolar motor. CLS VarMode = 0 VarRot = 0 VarRev = 0 VarDelay = 0 int1 = 0 Main: CLS OUT 888, 0 DO UNTIL INKEY$ <> "" PRINT "Enter the number of revolutions" INPUT VarRev VarRev = VarRev * 50 PRINT "Enter the Mode of operation" PRINT " 1 for single coil excitation" PRINT " 2 for double coil excitation" INPUT VarMode PRINT "Enter the number of delay cycles" INPUT VarDelay PRINT "Enter the direction of rotation" PRINT "5 for CW 7 for CCW" INPUT VarRot VarMode = VarRot + VarMode IF VarMode = 6 THEN GOTO ScCW: IF VarMode = 7