Arduino: simple web server to turn on and off an led.
Another web server for the Arduino that lets you turn on and off an led connected to pin 8. Easiest start for building a home automation setup.
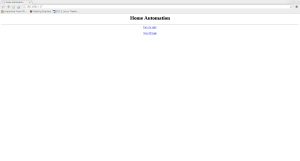
Web page;
Circuit:
<code>
/*
Web Server
A simple web server
Circuit:
* Ethernet shield attached to pins oA, 0B 0C, 0D
*/
//——————————————————————————————————-
#include <SPI.h>
#include <Ethernet.h>
Web Server
A simple web server
Circuit:
* Ethernet shield attached to pins oA, 0B 0C, 0D
*/
//——————————————————————————————————-
#include <SPI.h>
#include <Ethernet.h>
// Enter a MAC address and IP address for your controller below.
byte mac[] = {0×90, 0xA2, 0xDA, 0x0D, 0×48, 0xD3 };
byte mac[] = {0×90, 0xA2, 0xDA, 0x0D, 0×48, 0xD3 };
// The IP address will be dependent on your local network:
// assign an IP address for the controller:
// assign an IP address for the controller:
IPAddress ip(192,168,1,17);
IPAddress gateway(192,168,1,1);
IPAddress subnet(255, 255, 255, 0);
IPAddress gateway(192,168,1,1);
IPAddress subnet(255, 255, 255, 0);
// Initialize the Ethernet server library with the port you want to use.
EthernetServer server(80);
String readString;
//——————————————————————————————————-
//————————————————-
// Any extra codes for Declaration :
EthernetServer server(80);
String readString;
//——————————————————————————————————-
//————————————————-
// Any extra codes for Declaration :
// Declare Pin 8 as an LED because thats what we will be connecting the LED to.You could use any other pin and would then have to change the pin number.
int led = 8;
int led = 8;
//————————————————-
//——————————————————————————————————-
void setup()
{
//————————————————-
//——————————————————————————————————-
void setup()
{
//————————————————-
// Extra Set up code:
pinMode(led, OUTPUT); //pin selected to control
pinMode(led, OUTPUT); //pin selected to control
//————————————————-
//——————————————————————————————————-
//enable serial data print
Serial.begin(9600);
//——————————————————————————————————-
//enable serial data print
Serial.begin(9600);
//start Ethernet
Ethernet.begin(mac, ip, gateway, subnet);
server.begin();
Serial.print(“Server is at “);
Serial.println(Ethernet.localIP());
Serial.println(“LED Controller Test 1.0″);
}
//——————————————————————————————————-
//——————————————————————————————————-
Ethernet.begin(mac, ip, gateway, subnet);
server.begin();
Serial.print(“Server is at “);
Serial.println(Ethernet.localIP());
Serial.println(“LED Controller Test 1.0″);
}
//——————————————————————————————————-
//——————————————————————————————————-
void loop()
{
// listen for incoming clients
EthernetClient client = server.available();
if (client)
{
// listen for incoming clients
EthernetClient client = server.available();
if (client)
{
Serial.println(“new client”);
Serial.println(“new client”);
while (client.connected())
{
if (client.available())
{
if (client.available())
{
char c = client.read();
char c = client.read();
//read char by char HTTP request
if (readString.length() < 100)
if (readString.length() < 100)
{
//store characters to string
readString += c;
//Serial.print(c);
Serial.write(c);
// if you’ve gotten to the end of the line (received a newline
// character) and the line is blank, the http request has ended,
// so you can send a reply
//if HTTP request has ended
if (c == ‘\n’) {
Serial.println(readString); //print to serial monitor for debuging
//——————————————————————————————————–
// Needed to Display Site:
client.println(“HTTP/1.1 200 OK”); //send new page
client.println(“Content-Type: text/html”);
client.println();
client.println(“<HTML>”);
client.println(“<HEAD>”);
//——————————————————————————————————–
//————————————————-
//————————————————-
// what is being Displayed :
client.println(“<TITLE>Home Automation</TITLE>”);
client.println(“<center>”);
client.println(“</HEAD>”);
client.println(“<BODY>”);
client.println(“<H1>Home Automation</H1>”);
client.println(“<hr />”);
client.println(“<center>”);
client.println(“<center>”);
client.println(“</HEAD>”);
client.println(“<BODY>”);
client.println(“<H1>Home Automation</H1>”);
client.println(“<hr />”);
client.println(“<center>”);
client.println(“<a href=\”/?lighton\”\”>Turn On Light</a>”);
client.println(“<br />”);
client.println(“<br />”);
client.println(“<a href=\”/?lightoff\”\”>Turn Off Light</a><br />”);
client.println(“<br />”);
client.println(“<br />”);
client.println(“<a href=\”/?lightoff\”\”>Turn Off Light</a><br />”);
client.println(“</BODY>”);
client.println(“</HTML>”);
client.println(“</HTML>”);
delay(1);
//stopping client
client.stop();
//stopping client
client.stop();
//————————————————-
// Code which needs to be Implemented:
if(readString.indexOf(“?lighton”) >0)//checks for on
{
digitalWrite(8, HIGH); // set pin 4 high
Serial.println(“Led On”);
}
else{
if(readString.indexOf(“?lightoff”) >0)//checks for off
{
digitalWrite(8, LOW); // set pin 4 low
Serial.println(“Led Off”);
}
}
//clearing string for next read
readString=”";
// give the web browser time to receive the data
delay(1);
// close the connection:
client.stop();
Serial.println(“client disconnected”);
delay(1);
// close the connection:
client.stop();
Serial.println(“client disconnected”);
}
}
}
}
}
}
}
}
}
}
}
</code>


Comments
Post a Comment