Posts

Showing posts from April, 2017

Starting slackware 14.2 in a virtual machine.

Image
Started with Slackware linux and decided to go back and look at it.  In this case, I plan to use qemu to build a virtual machine. You will need to have a stable internet access for this project. You also need to have a fast machine with over a gig of memory.  You will not need to download and burn a cd or dvd.  You will need a floppy, usb, cd, or a network interface card that supports gpxe (ipxe). You will want to go to romomatic,net to build your image to put on your boot device. Though with Qemu you can just use the image without creating boot media,  Though I do recommend using 256 megabytes of ram. Be sure to set up the virtual drive for your install. Once you have everything the way you want then you can launch the install. Eventually you will get to a login and the you can start the the good old install; AAh, at home again. ------------------------------------------------------------------------------------------------------- Slackware pxeboot script:

Motioneyeos.

Image
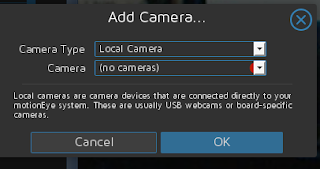
Normally I am not fond of canned software, but this one might be an exception. Motioneyeos is a raspberry pi implementation for the program Motion. Motion is software to control video capture devices. All control is done via the web. For purposes of this project we used an original raspberry pi. ( https://github.com/ccrisan/motioneyeos/releases ). There are several releases depending on the unit you have. First I tried a logitech usb camera clone. The system recognized it immediately. Not like a certain other operating system where you have to load the drivers for almost everything. Then we added an ipcamera (network ready). After adding the network camera file, it worked just like you would expect. The documentation for the camera did not have the description of the file. Fortunately the Motion software site did have that information.  ( http://www.lavrsen.dk/foswiki/bin/view/Motion/WorkingDevices ) Again no additional drivers were required. Actual picture is much cl

Basic pi setup.

Image
  Basic setup ----------------- install jessie os do updates install vim mc Wifi ------ Check Ethernet & Wifi Before continuing make sure the Ethernet cable is connected in and you can ping out from the Pi: ping 8.8.8.8 You will also want to set up your WiFi dongle. run sudo shutdown -h now and then plug in the WiFi module when the Pi is off so you don't cause a power surge. If you have a Pi 3, or any other Pi with built in WiFi, an external WiFi adapter is not required but you can use one if you need a bigger/external antenna.  When it comes back up check with ifconfig -a that you see wlan0 - the WiFi module. Install software ----------------- Next up we install the software onto the Pi that will act as the 'hostap' (host access point). You need internet access for this step so make sure that Ethernet connection is up! sudo apt-get update sudo apt-get install hostapd isc-dhcp-server (You may need to sudo apt-get update if the Pi can